Question
How to install VOS (Versa Operating System) on a white box using USB?
Solution
Follow these steps to create and boot VOS on a white box using a USB:
Step 1 — Create a Bootable USB Drive
Follow one of these methods (as published by Ubuntu):
- Please download the ISO file for the required image.
- Preferably use a USB 3.0 stick for faster installation.
Detailed Steps: Install on Bare Metal — Versa Docs
Windows
- Use Rufus to create a bootable USB (do not use any other utility such as unetbootin).
Ubuntu
- Use native Startup Disk Creator.
macOS
Rufus does not run on macOS. Use the following alternatives:
GUI Tools:
- balenaEtcher
Simple GUI: select ISO → select USB → Flash. Best for quick USB creation. - UNetbootin
GUI-based ISO to USB creator. May have limitations with some images. - Ventoy
Install Ventoy on USB once, then copy multiple ISOs. Boot menu lets you pick ISO at startup. Best for advanced multi-ISO use.
CLI Method (Advanced):
- Use Disk Utility to format USB (FAT32).
- Use Terminal with
ddto write ISO.
sudo dd status=progress if=<VOS/Director/Analytics ISO> of=/dev/sdbExample macOS Workflow (balenaEtcher):
- Install balenaEtcher on macOS.
- Insert USB (8GB+).
- Select ISO → Select USB → Flash.
- Eject USB and boot white box from USB.
P.S: In case the console cable driver is missing on a new Windows laptop, please refer to: Console Cable Not Working on Windows — Install Missing CP210x USB to UART Driver
Step 2 — Boot from the USB Drive
- After the white box boots up with the USB drive, it displays the
boot:prompt. - Run the
versa-branch-usbcommand and press <Enter>.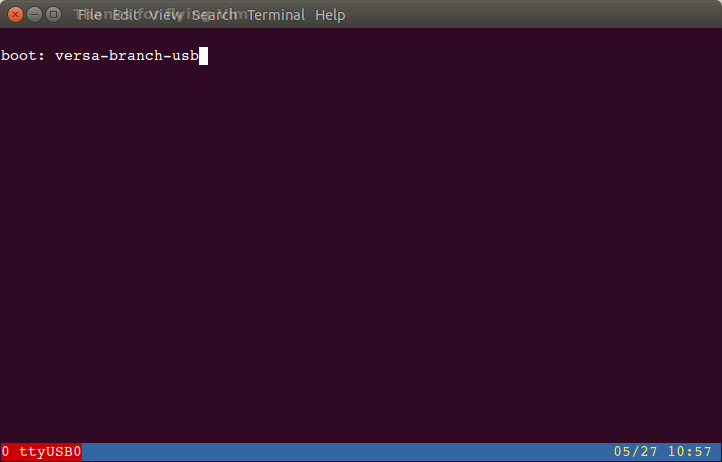
- Press <SPACE> when prompted for the video mode.
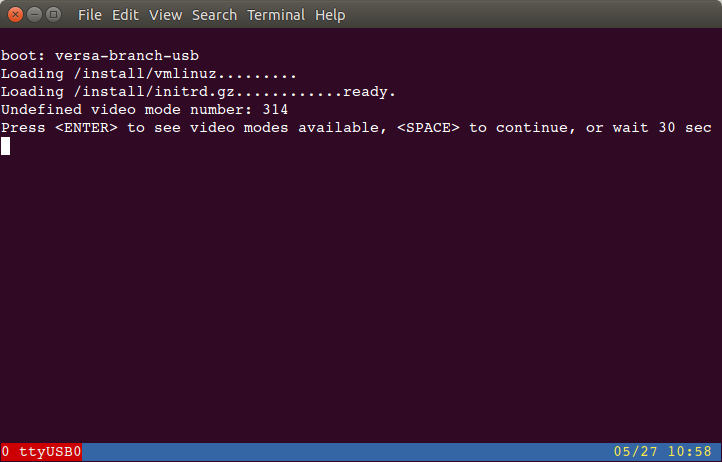
Since this process is automated, the installation finishes after this step.
Notes:
- If you get an error "Your installation CD-ROM couldn't be mounted.." — remove the USB drive from the device and re-insert it. Wait for 5 seconds and then choose the <Yes> option to retry mounting the CD-ROM.
- If you are installing on a system where the hard disk already had partitions, you may get prompted to Unmount partitions in use. Choose <Yes> and continue the installation.
- Final step of installation (Running kickseed) may take a little longer time (10–15 minutes).
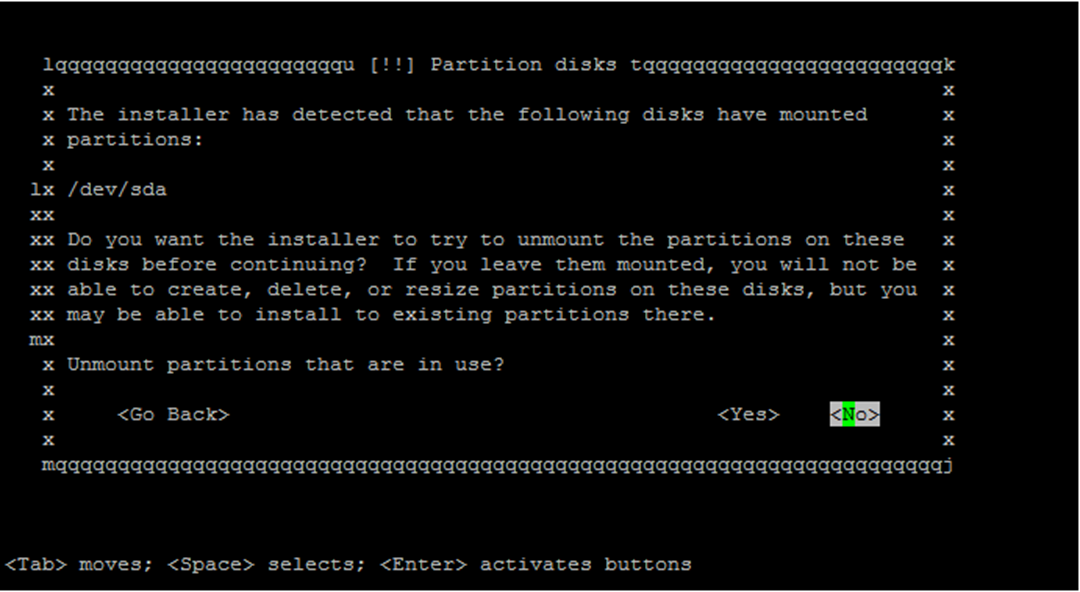

NOTE: After installation, eth0 comes up with the static address of
10.10.10.10/8
Validating Installation
Follow these steps to validate the successful installation of Versa FlexVNF on the white box:
Step 1 — Login via Console
Login to the white box using the console. The box must be connected at a baud rate of 115200.
Default Login Credentials:
- Username:
admin - Password:
versa123
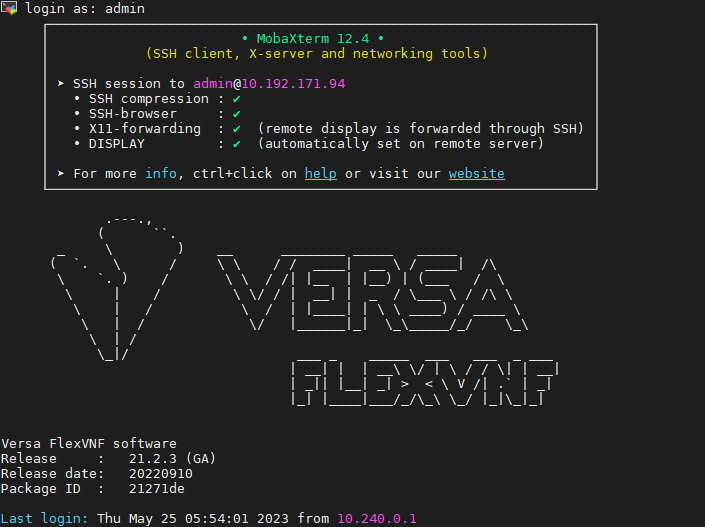
Step 2 — Enter CLI Mode
Run the cli command to enter the CLI mode.
Step 3 — Verify Interfaces
Run the following CLI command:
admin@versa-flexvnf-cli> show interfaces brief | tab | nomoreCommand output:
NAME       MAC                OPER   ADMIN  TENANT  VRF                        IP
-----------------------------------------------------------------------------------------------
eth-0/0    74:fe:48:09:3a:ae  up     up     0       global           10.10.10.10/8
tvi-0/0    n/a                up     up     -       -
tvi-0/0.0  n/a                pdown  up     1       Versa-Provider-Control-VR
tvi-0/1    n/a                up     up     -       -
tvi-0/1.0  n/a                pdown  up     1       Versa-Provider-Control-VR
vni-0/0    74:fe:48:07:d5:73  down   up     -       -
vni-0/0.0  74:fe:48:07:d5:73  down   up     1       WAN1-Transport-VR
vni-0/0.1  74:fe:48:07:d5:73  down   up     1       WAN1-Transport-VR
vni-0/1    74:fe:48:09:3a:af  down   up     -       -
vni-0/1.0  74:fe:48:09:3a:af  down   up     1       global           192.168.1.1/24
vni-0/2    74:fe:48:07:d5:70  down   up     -       -
vni-0/2.0  74:fe:48:07:d5:70  down   up     1       WAN1-Transport-VR
vni-0/2.1  74:fe:48:07:d5:70  down   up     1       WAN1-Transport-VR
vni-0/3    74:fe:48:07:d5:74  down   down   -       -
vni-0/4    74:fe:48:09:3a:ad  down   down   -       -

[ok][2018-02-02 19:11:31]
admin@versa-flexvnf-cli>
Look for this line in the output:
vni-0/1.0 74:fe:48:09:3a:af down up 1 global 192.168.1.1/24- If this line does not appear, wait for 2 minutes and re-run the command. Alternatively, press the up arrow to reenter the last used command.
- Power off the white box when the above line appears in the command output.
Steps to Load Default Configuration
Versa software installs default device configuration upon first boot in the factory. If the system is rebooted before the software has had a chance to load the config, then the system is left without the default config.
Follow these steps when the validation procedure mentioned above (Validating Installation) fails:
- Run the
clicommand to enter the CLI mode. - Run the
configcommand to enter configuration mode. - In config mode, run:
load merge /opt/versa/etc/bootcfg/default-device.cfg - Run the
commitcommand to save and commit the default configuration. - Run
show interfaces brief | tab | nomoreto check interface status.
Example:
admin@Controller1:~$ cli

admin connected from 10.40.40.1 using ssh on Controller1
admin@Controller1-cli> conf
Entering configuration mode private
[ok][2018-07-06 12:41:24]

[edit]
admin@Controller1-cli(config)% load merge /opt/versa/etc/bootcfg/default-device.cfg
[ok][2018-07-06 12:41:27]

[edit]
admin@Controller1-cli(config)% commit
In case of any further concerns or queries, feel free to write us at support@versa-networks.com.