This article describes how to configure authentication, authorization, and accounting (AAA) for users who access FlexVNF devices.
Authentication identifies users to determine whether they are allowed to access a FlexVNF device, the network, and related services. To authenticate a user, you can use an internal or external user database. The external database can be on a RADIUS or TACACS+ server.
TACACS+ provides detailed accounting information and flexible administrative control over authentication and authorization processes.
Case 1: Authenticating the FlexVNF via the eth0/Mgmt network.
Step1: To configure TACACS+:
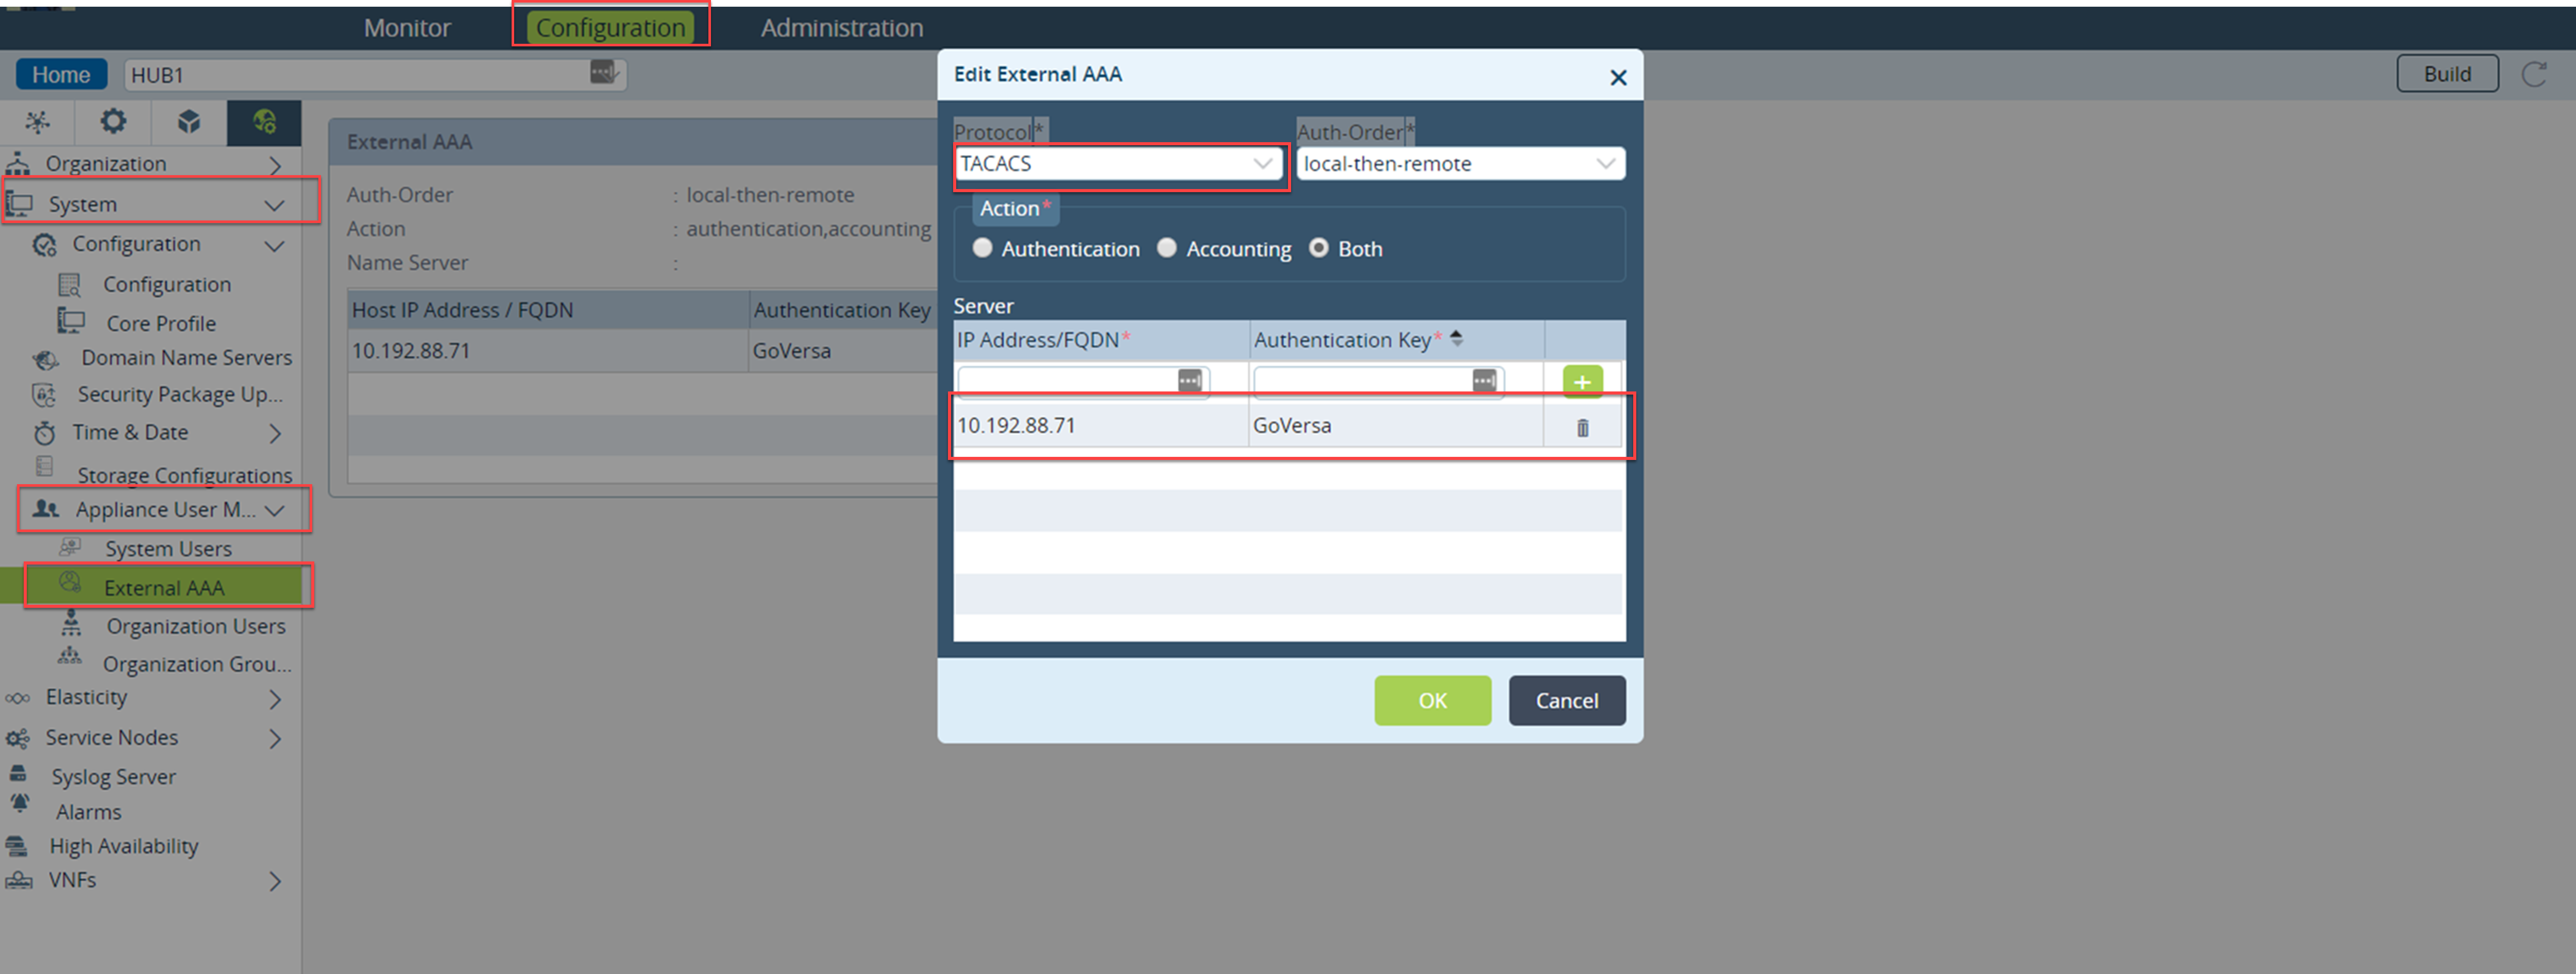
- In the Appliance view select configuration>others>system>users>external User.
- Click the edit option to add the TACACS+ server.
- Add the TACACS+ server IP Address and key.
Authentication Order Option | Description |
local-then-remote | The user is authenticated by checking the local database first, then the remote database. |
remote-only | The user is authenticated by checking the remote database only. |
remote-then-local | The user is authenticated by checking the remote database first. If the remote database is unreachable, the local database is then searched. |
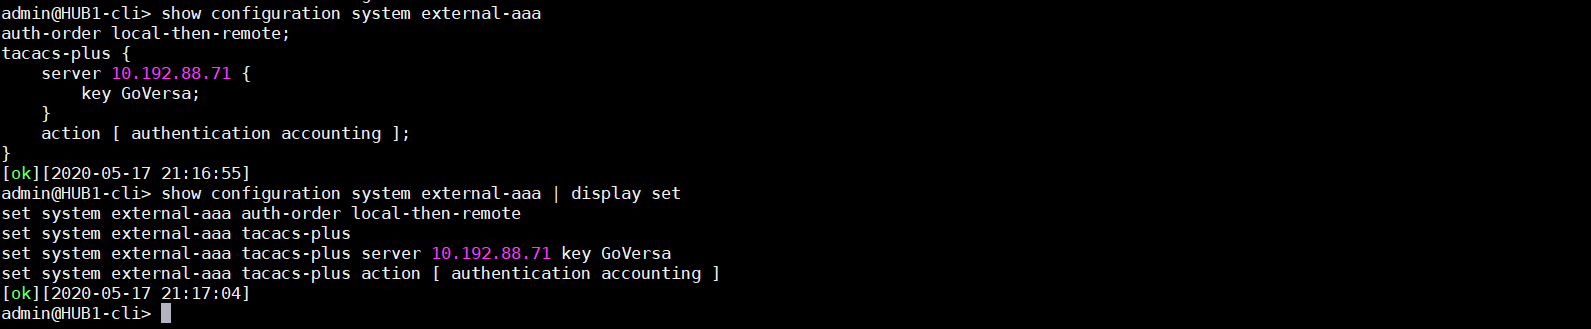
CLI Output of FlexVNF:
Step2: To Configure TACACS+ Server
- Add Versa specific configuration to TACACS+
- Open the TACACS+ configuration file as sudo user “sudo vi tac_plus.conf”, under /etc/tacacs+.
- Configure the Key (This key will be used on the connector defined on Versa FlexVNF )
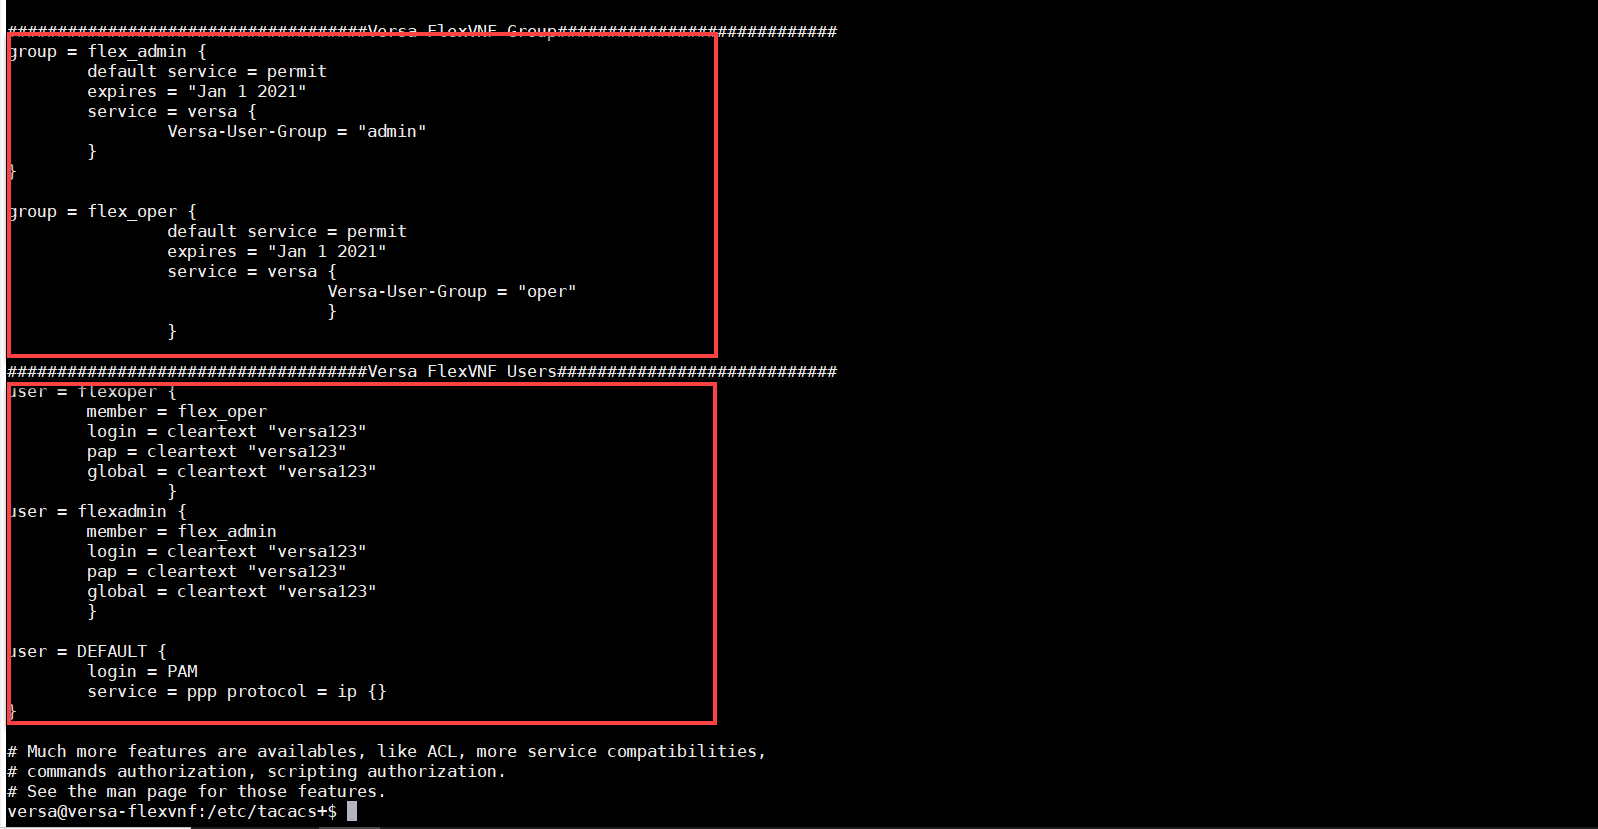
- Add Versa specific configuration such as Group and associated User to this configuration file
Below is an example of TACACS+ Configurations.
# Define where to log accounting data, this is the default.
accounting file = /var/log/tac_plus.acct
# This is the key that clients have to use to access Tacacs+
key = GoVersa
##########################Versa FlexVNF Group############################
group = flex_admin {
default service = permit
expires = "Jan 1 2021"
service = versa {
Versa-User-Group = "admin"
}
}
group = flex_oper {
default service = permit
expires = "Jan 1 2021"
service = versa {
Versa-User-Group = "oper"
}
}
###########################Versa FlexVNF Users#####################
user = flexoper {
member = flex_oper
login = cleartext "versa123"
pap = cleartext "versa123"
global = cleartext "versa123"
}
user = flexadmin {
member = flex_admin
login = cleartext "versa123"
pap = cleartext "versa123"
global = cleartext "versa123"
}

Step3: For the configuration to take effect, we must stop and start the TACACS+ service.
- To stop the tacacs service use following command
sudo /etc/init.d/tac_plus stop - To start the tacacs service use following command
sudo /etc/init.d/tac_plus start

Case 2: Authenticating the FlexVNF using LAN/Overlay network.
Step1: TACACS Configuration.
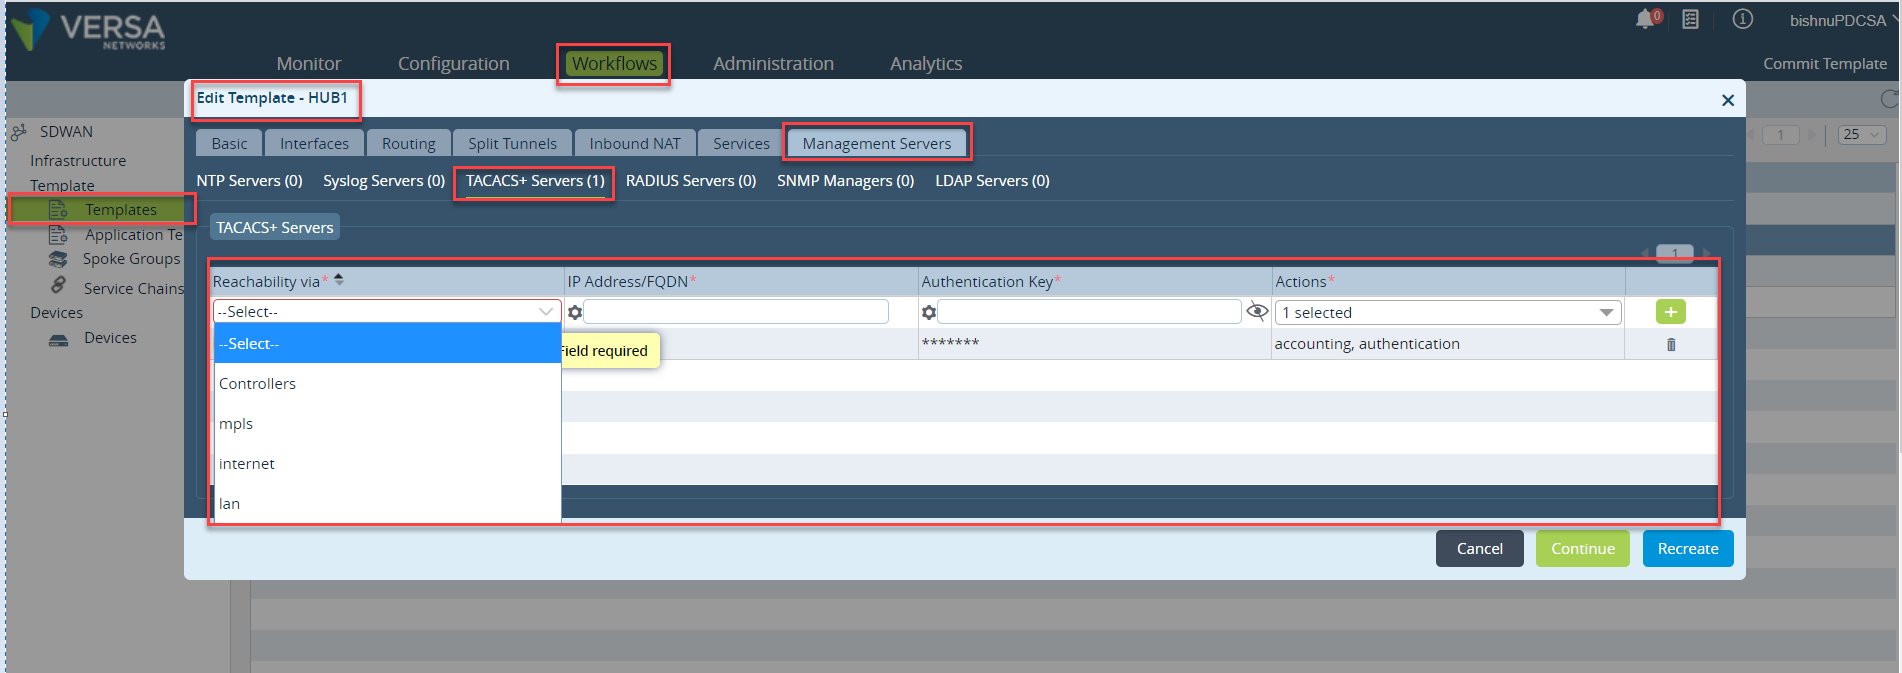
Create or edit the existing template. select the Management Servers tab. Enter information for the following fields.
Click Save. The main pane shows the new or edited templates.
Step2: Commit the new template to the FlexVNF, which will push the TACACS configuration to FlexVNF.
Step3: TACACS Configuration.
For TACACS configuration please refer the Case1 step2.
Troubleshooting:
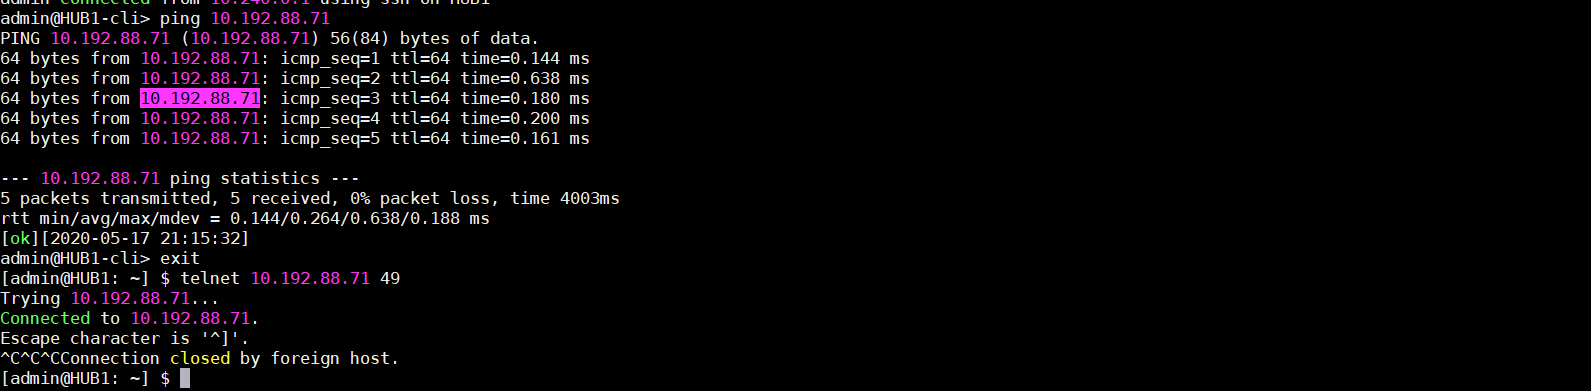
Verify the Connectivity between Versa FlexVNF and TACACS Server
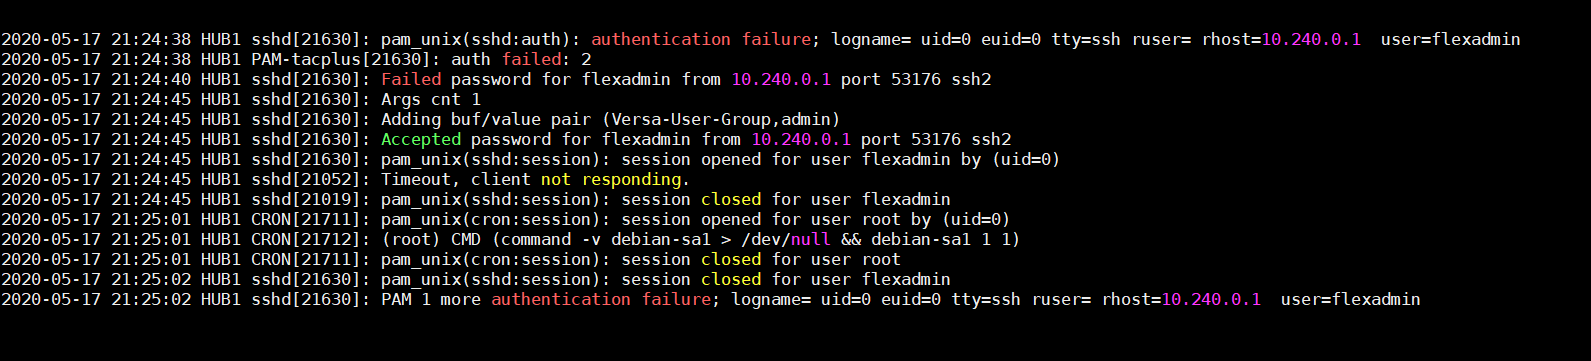
Check the logs under “/var/log/syslog"
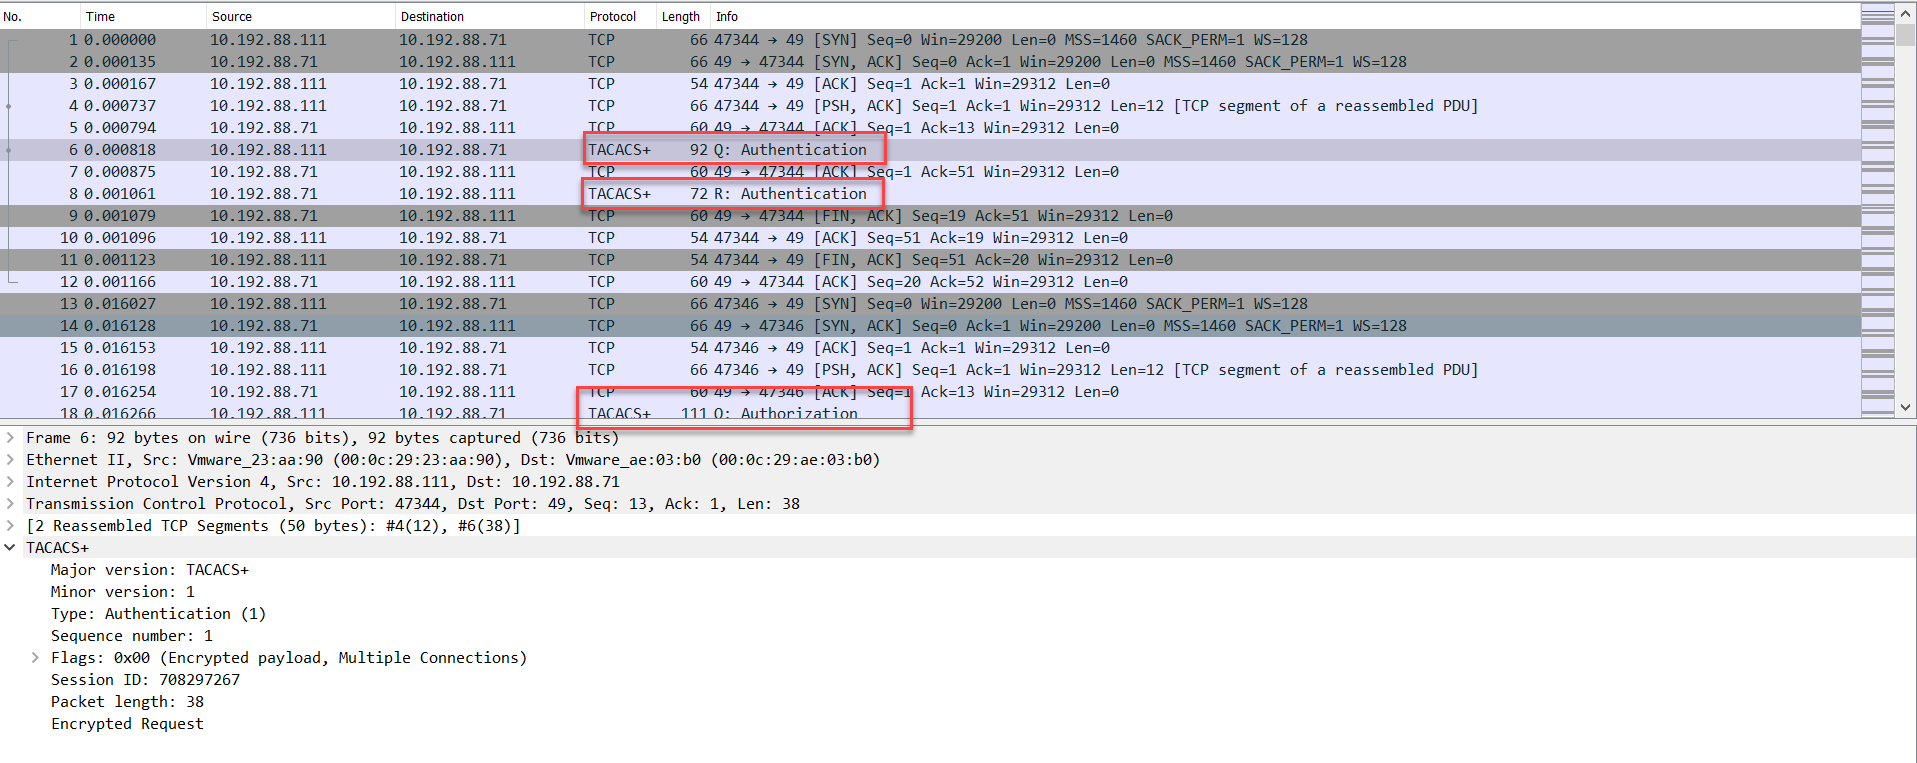
Check the packet capture if any issue in login the FlexVNF.
When you are unable to log in to the TACACS server, you can capture packets on the Ethernet interface on which the TACACS server is reachable. For example, if you reach the TACACS server on the eth0 interface, capture packets as follows. The output shows the Request (Q) and Response (R) packets from the TACACS server.
[admin@HUB1: ~] $ sudo tcpdump -i eth0 port 49 -w tacacs.pcap
Check the user might have locked due to more failed attempts.
A user is locked out and cannot log in after 10 unsuccessful login attempts. Check the number of times that a user tried to log in:
